Getting Started With Kubernetes
Let’s get started with Kubernetes and play around with it locally.
Foreword
This article is largely inspired by the official Kubernetes getting started guide.
What is minikube?
Minikube is a tool that makes it easy to run Kubernetes locally. Minikube runs a single-node Kubernetes cluster inside a VM on your laptop for users looking to try out Kubernetes or develop with it day-to-day.
Installation
Full instructions can be found on minikube installation guide
There are many options you can choose from. Here’s the ones I’ve selected:
- VirtualBox
kubectl- MiniKube
If you’re used to work with virtual machines locally, chances are you already have VirtualBox installed.
$ vboxmanage --version
5.1.10r112026
OK, Virtualbox is already present on this machine, let’s move on to the next requirement.
$ kubectl version
# Nothing...
Right, let’s install kubectl.
$ brew install kubectl
Now:
$ kubectl version
Client Version: version.Info{Major:"1", Minor:"7", GitVersion:"v1.7.4", GitCommit:"793658f2d7ca7f064d2bdf606519f9fe1229c381", GitTreeState:"clean", BuildDate:"2017-08-17T17:03:51Z", GoVersion:"go1.8.3", Compiler:"gc", Platform:"darwin/amd64"}
Next, let’s install minikube:
$ curl -Lo minikube https://storage.googleapis.com/minikube/releases/v0.21.0/minikube-darwin-amd64 && chmod +x minikube && sudo mv minikube /usr/local/bin/
And check:
$ minikube version
minikube version: v0.21.0
Great! We’re all set.
Start minikube
Starting minikube will provide a cluster on a single node basis within a VM on top of your laptop.
We can then use kubernetes on this cluster.
$ minikube start
Starting local Kubernetes v1.7.0 cluster...
Starting VM...
Downloading Minikube ISO
 97.80 MB / 97.80 MB [==============================================] 100.00% 0s
Getting VM IP address...
Moving files into cluster...
Setting up certs...
Starting cluster components...
Connecting to cluster...
Setting up kubeconfig...
Kubectl is now configured to use the cluster.
Ok, where are we now? minikube is started, which comes with a handy tool:
$ minikube dashboard
This will open in your browser a GUI where you can see what’s currently available.
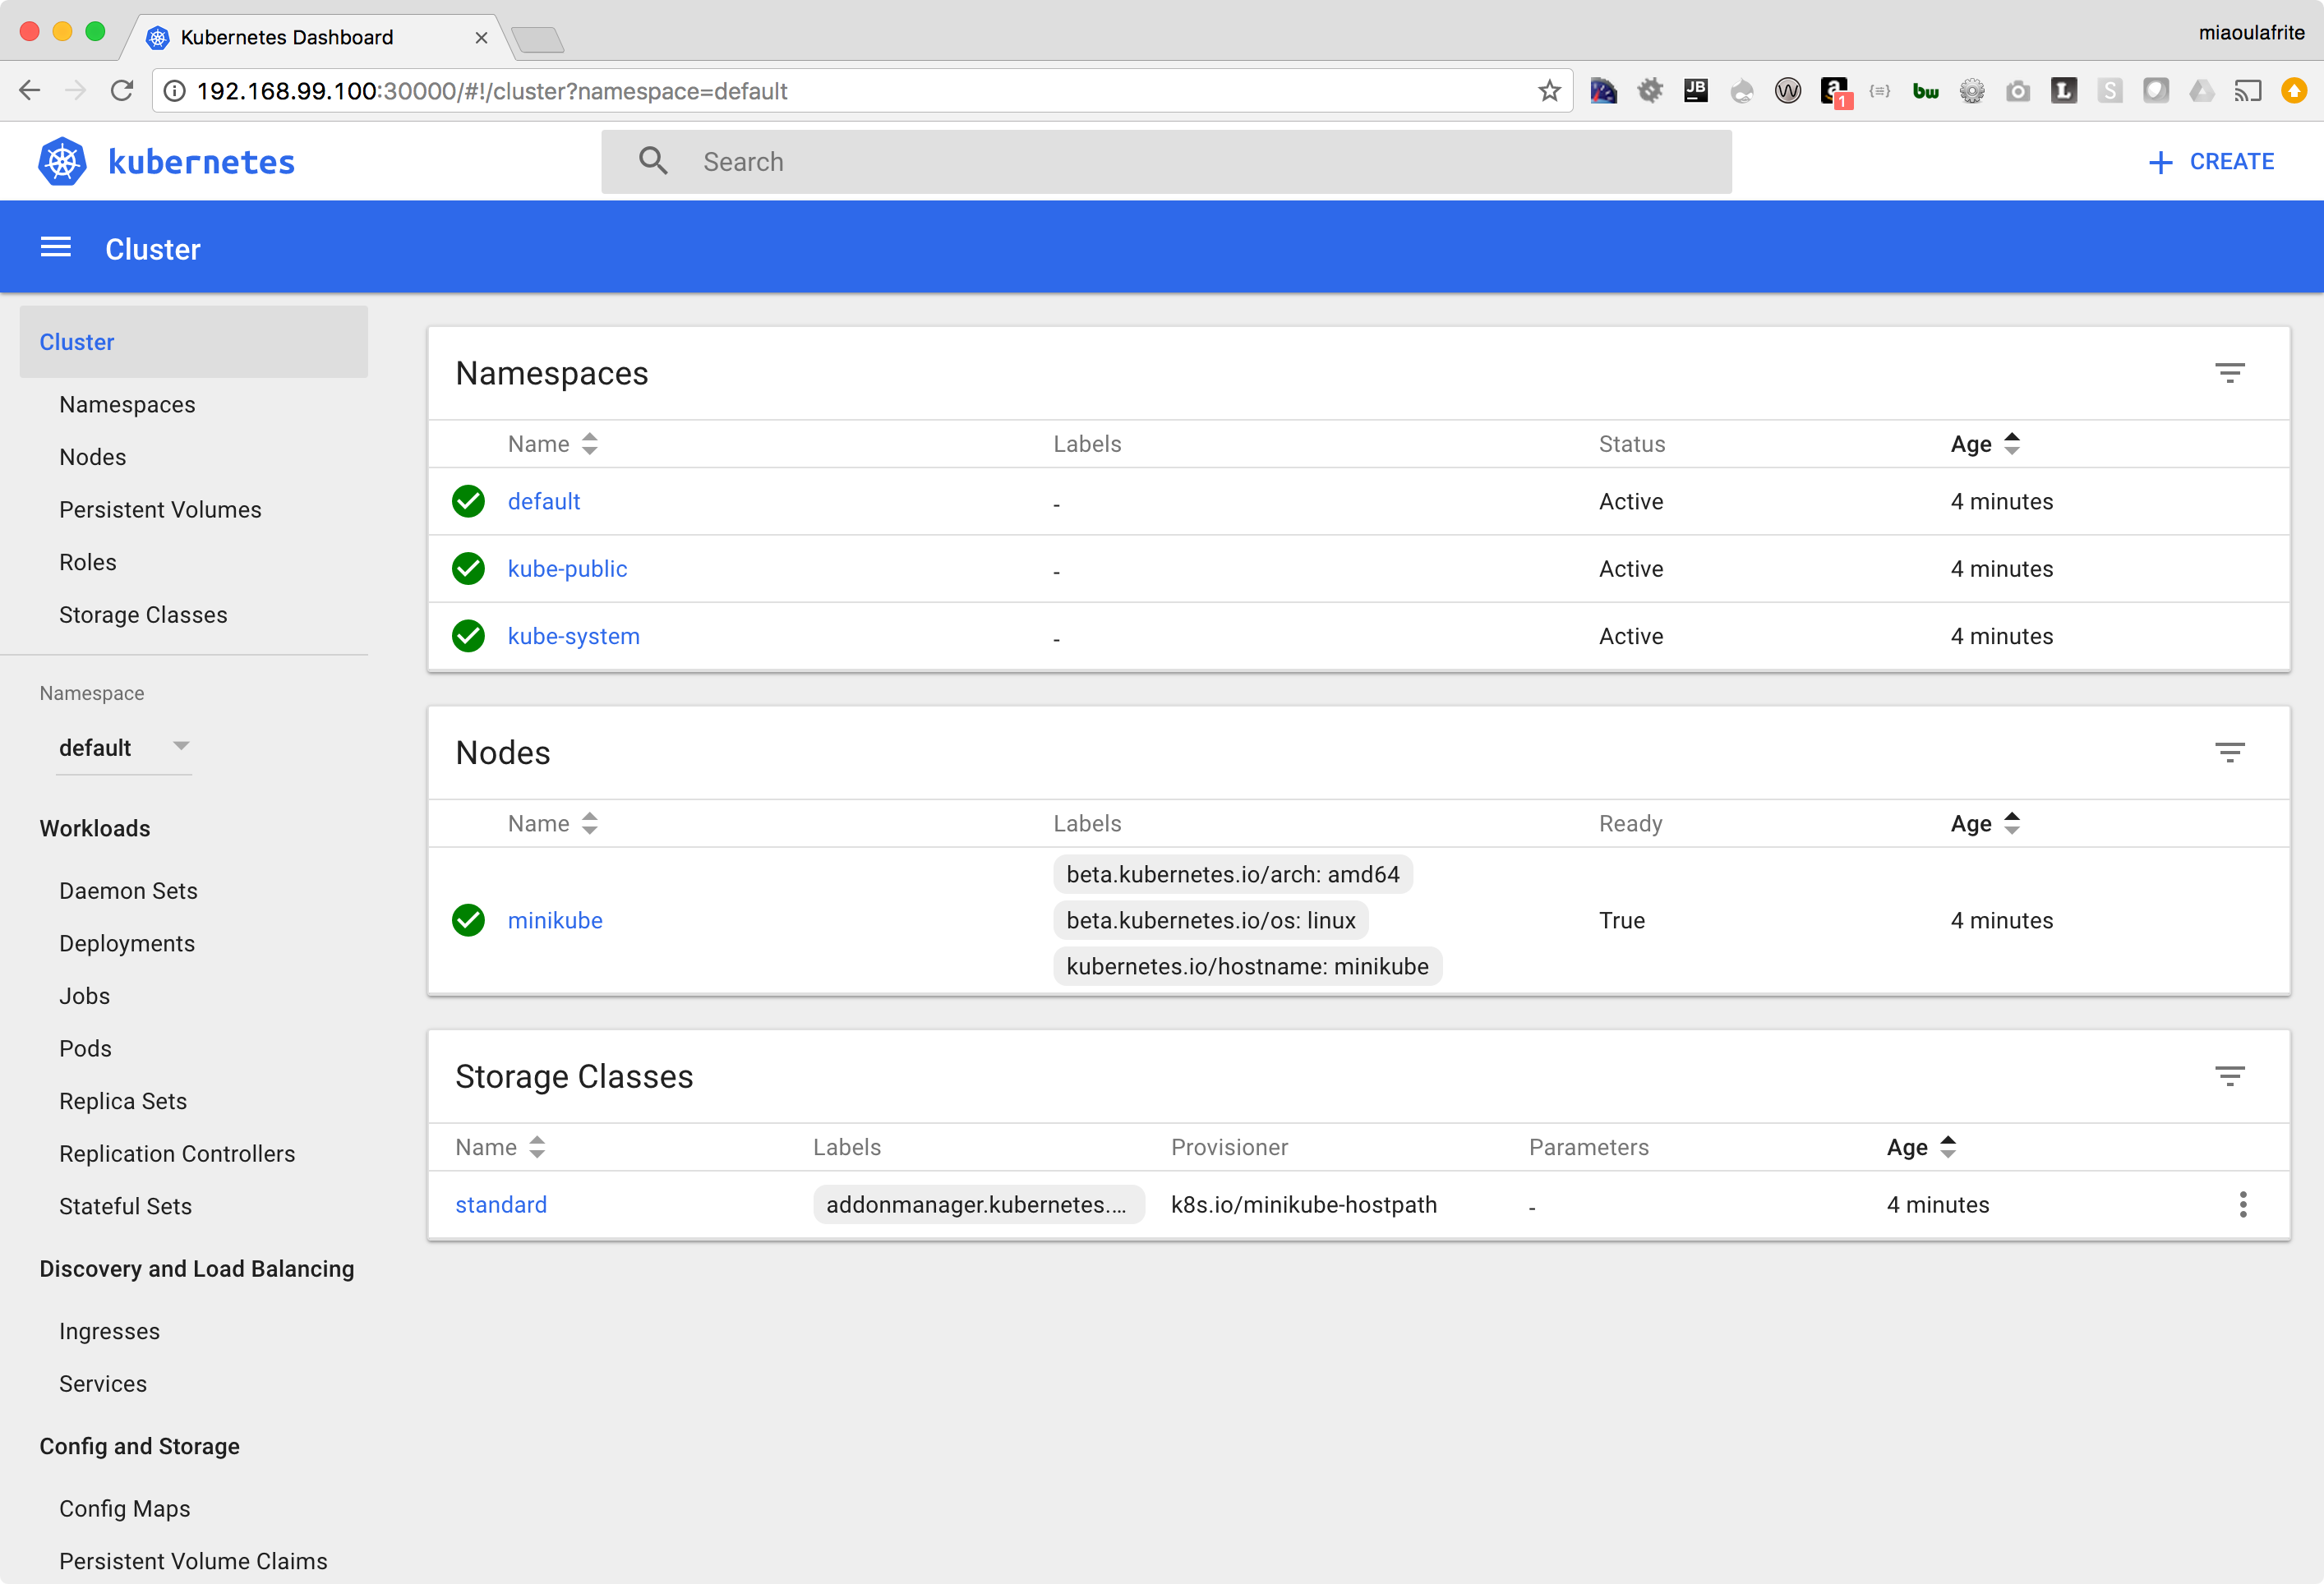
Minikube's dashboard
Seems pretty empty eh? Let’s run some things now on it. But first, let’s see what options are available:
$ kubectl
kubectl controls the Kubernetes cluster manager.

Find more information at https://github.com/kubernetes/kubernetes.

Basic Commands (Beginner):
  create         Create a resource by filename or stdin
  expose         Take a replication controller, service, deployment or pod and expose it as a new Kubernetes Service
  run            Run a particular image on the cluster
  run-container  Run a particular image on the cluster
  set            Set specific features on objects

Basic Commands (Intermediate):
  get            Display one or many resources
  explain        Documentation of resources
  edit           Edit a resource on the server
  delete         Delete resources by filenames, stdin, resources and names, or by resources and label selector

Deploy Commands:
  rollout        Manage the rollout of a resource
  rolling-update Perform a rolling update of the given ReplicationController
  rollingupdate  Perform a rolling update of the given ReplicationController
  scale          Set a new size for a Deployment, ReplicaSet, Replication Controller, or Job
  resize         Set a new size for a Deployment, ReplicaSet, Replication Controller, or Job
  autoscale      Auto-scale a Deployment, ReplicaSet, or ReplicationController

Cluster Management Commands:
  certificate    Modify certificate resources.
  cluster-info   Display cluster info
  clusterinfo    Display cluster info
  top            Display Resource (CPU/Memory/Storage) usage.
  cordon         Mark node as unschedulable
  uncordon       Mark node as schedulable
  drain          Drain node in preparation for maintenance
  taint          Update the taints on one or more nodes

Troubleshooting and Debugging Commands:
  describe       Show details of a specific resource or group of resources
  logs           Print the logs for a container in a pod
  attach         Attach to a running container
  exec           Execute a command in a container
  port-forward   Forward one or more local ports to a pod
  proxy          Run a proxy to the Kubernetes API server
  cp             Copy files and directories to and from containers.
  auth           Inspect authorization

Advanced Commands:
  apply          Apply a configuration to a resource by filename or stdin
  patch          Update field(s) of a resource using strategic merge patch
  replace        Replace a resource by filename or stdin
  update         Replace a resource by filename or stdin
  convert        Convert config files between different API versions

Settings Commands:
  label          Update the labels on a resource
  annotate       Update the annotations on a resource
  completion     Output shell completion code for the specified shell (bash or zsh)

Other Commands:
  api-versions   Print the supported API versions on the server, in the form of "group/version"
  config         Modify kubeconfig files
  help           Help about any command
  plugin         Runs a command-line plugin
  version        Print the client and server version information

Use "kubectl <command> --help" for more information about a given command.
Use "kubectl options" for a list of global command-line options (applies to all commands).
And perhaps more particularly
$ kubectl run --help
Create and run a particular image, possibly replicated.

Creates a deployment or job to manage the created container(s).

Examples:
  # Start a single instance of nginx.
  kubectl run nginx --image=nginx

  # Start a single instance of hazelcast and let the container expose port 5701 .
  kubectl run hazelcast --image=hazelcast --port=5701

  # Start a single instance of hazelcast and set environment variables "DNS_DOMAIN=cluster" and "POD_NAMESPACE=default" in the container.
  kubectl run hazelcast --image=hazelcast --env="DNS_DOMAIN=cluster" --env="POD_NAMESPACE=default"

  # Start a replicated instance of nginx.
  kubectl run nginx --image=nginx --replicas=5

  # Dry run. Print the corresponding API objects without creating them.
  kubectl run nginx --image=nginx --dry-run

  # Start a single instance of nginx, but overload the spec of the deployment with a partial set of values parsed from JSON.
  kubectl run nginx --image=nginx --overrides='{ "apiVersion": "v1", "spec": { ... } }'

  # Start a pod of busybox and keep it in the foreground, don't restart it if it exits.
  kubectl run -i -t busybox --image=busybox --restart=Never

  # Start the nginx container using the default command, but use custom arguments (arg1 .. argN) for that command.
  kubectl run nginx --image=nginx -- <arg1> <arg2> ... <argN>

  # Start the nginx container using a different command and custom arguments.
  kubectl run nginx --image=nginx --command -- <cmd> <arg1> ... <argN>

  # Start the perl container to compute π to 2000 places and print it out.
  kubectl run pi --image=perl --restart=OnFailure -- perl -Mbignum=bpi -wle 'print bpi(2000)'

  # Start the cron job to compute π to 2000 places and print it out every 5 minutes.
  kubectl run pi --schedule="0/5 * * * ?" --image=perl --restart=OnFailure -- perl -Mbignum=bpi -wle 'print bpi(2000)'

# ... More stuff below cut for readability...
Right, the getting started guide from kubernetes recommends the following:
$ kubectl run hello-minikube --image=gcr.io/google_containers/echoserver:1.4 --port=8080
deployment "hello-minikube" created
So we’ve now created a deployment, which provides declarative updates for Pods and ReplicaSets. > You describe a desired state in a Deployment object, and the Deployment controller changes the actual state to the desired state at a controlled rate. You can define Deployments to create new ReplicaSets, or to remove existing Deployments and adopt all their resources with new Deployments.
Let’s have a look at it in the Dashboard:

hello-minikube Deployment details
We now need to expose it as a service so that we can access it.
$ kubectl expose --help
Expose a resource as a new Kubernetes service.

Looks up a deployment, service, replica set, replication controller or pod by name and uses the selector for that
resource as the selector for a new service on the specified port. A deployment or replica set will be exposed as a
service only if its selector is convertible to a selector that service supports, i.e. when the selector contains only
the matchLabels component. Note that if no port is specified via --port and the exposed resource has multiple ports, all
will be re-used by the new service. Also if no labels are specified, the new service will re-use the labels from the
resource it exposes.

Possible resources include (case insensitive):

pod (po), service (svc), replicationcontroller (rc), deployment (deploy), replicaset (rs)

Examples:
  # Create a service for a replicated nginx, which serves on port 80 and connects to the containers on port 8000.
  kubectl expose rc nginx --port=80 --target-port=8000

# ... More stuff below cut for readability...
Going back to the getting started guide, we have:
$ kubectl expose deployment hello-minikube --type=NodePort
This tells kubernetes to expose the deployment we just created, and expose it with type being NodePort.
What’s that option about?
The service types define these options:
ClusterIP(default): Exposes the service on a cluster-internal IP. Choosing this value makes the service only reachable from within the clusterNodePort: Exposes the service on each Node’s IP at a static port (theNodePort). AClusterIPservice, to which theNodePortservice will route, is automatically created. You’ll be able to contact theNodePortservice, from outside the cluster, by requesting<NodeIP>:<NodePort>- Great this is indeed what we want here. So that we can access this service from our laptop.
LoadBalancer: Exposes the service externally using a cloud provider’s load balancer.NodePortandClusterIPservices, to which the external load balancer will route, are automatically created.ExternalName: Maps the service to the contents of theexternalNamefield (e.g.foo.bar.example.com), by returning aCNAMErecord with its value. No proxying of any kind is set up
Read more about type NodePort.
So let’s run this command now:
$ kubectl expose deployment hello-minikube --type=NodePort
service "hello-minikube" exposed
We can now find the service in the Dashboard:

hello-minikube Service details
Let’s see if we can reach it now:
$ curl $(minikube service hello-minikube --url)
CLIENT VALUES:
client_address=172.17.0.1
command=GET
real path=/
query=nil
request_version=1.1
request_uri=http://192.168.99.100:8080/

SERVER VALUES:
server_version=nginx: 1.10.0 - lua: 10001

HEADERS RECEIVED:
accept=*/*
host=192.168.99.100:30763
user-agent=curl/7.54.0
BODY:
-no body in request-
Just out of curiosity:
$ minikube service hello-minikube --url
http://192.168.99.100:30763
As defined in the docs exposed port is effectively in the range 30000-32767.
Clean up
We can now clean up by stopping minikube:
$ minikube stop
Stopping local Kubernetes cluster...
Machine stopped.


